.png)
Procreate: For Beginners
- Kathryn Houghton
- Oct 12, 2020
- 3 min read
Updated: May 8, 2021

Whether you’re an aspiring artist who‘s never touched digital art or one who’s looking for a different program, Procreate is user friendly in every aspect. I first started using it three years ago and never looked back. Granted, my style hasn’t changed much, but I’m happy with my rough sketches for now.
Let me show you just a few basic things you’ll need to know about Procreate.
Your Gallery

Your gallery is essentially like the apps home screen. This is where you can find all of your artworks together. You can rename them and even organize them into folders. To create folders just hold down on one draft and move it towards another until they merge.
Creating Your Canvas

To create a new canvas, just tap the + icon at the top right of your screen. You can save your go-to dimensions and name them, which is very convenient! I personally just do a screen size canvas for most of my sketches or panels.
The Endless Brushes

Once you’ve chosen a canvas size, you’re immediately taken to your workspace. Once inside, you can access your tools by tapping the brush icon that I circled in the photo above. (Also the beginning stages of one of my sketches, this time with Anne Shirley and Gilbert Blythe.)

From here, there are multiple categories of brushes to choose from. Take your time and experiment with them; tweak them to your liking. I personally start my pieces with either the 6B Pencil or I’ll go into Inking. But just like what every other artist will tell you, there’s no right or wrong on where to start!
This is actually one of my favorite things about Procreate. Not only are there countless brushes with amazing textures to choose from, but you can also create your own! I haven’t mastered creating my own brushes yet, but it’s truly so fun to play with. Let your imagination run wild!
Capping Layers? Seems Unlikely
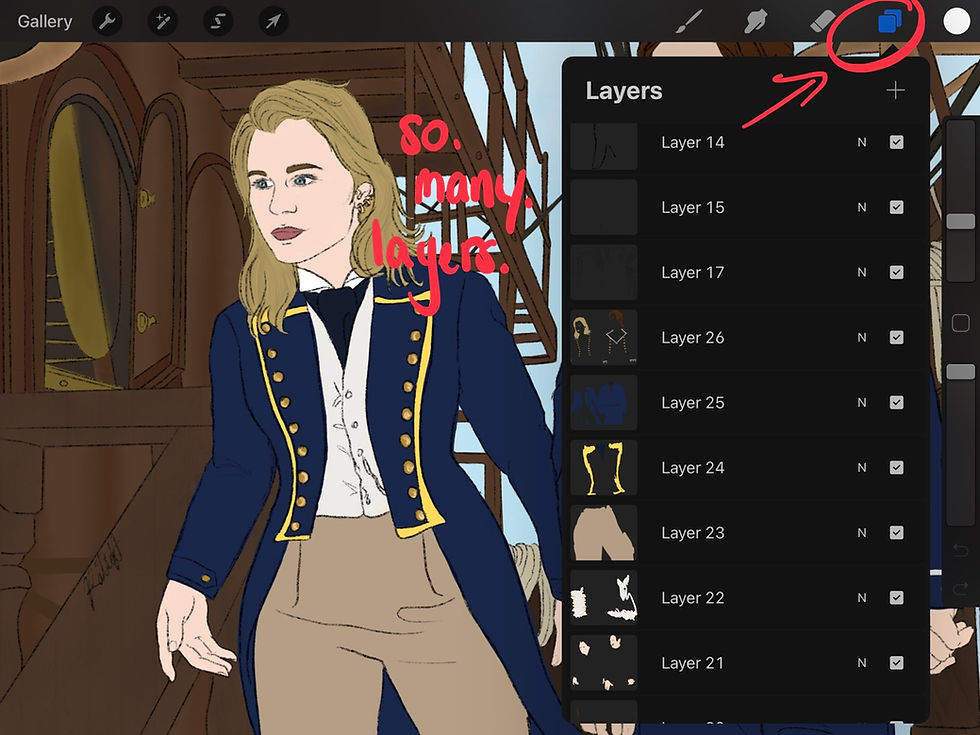
The other problem I frequently had with art platforms was layers getting capped after 10 or so. Procreate seems to let you go on forever. Okay, maybe not forever. But you can get to a decent number without hesitation. Even when it has got capped for me, it then gave me the option of creating folders for my layers. And voila! More layers after all.
Blend It

I still struggle with how much blending is too much, but this little tool helps so much. The blending tool has all the same brushes as you normally would so that you can have that consistent texture. I normally go in with a medium brush, but there have been cases where I need something a little harsher.
When blending, you may want to start at half opacity and work from there, just so that you can have a gradual shift in color and depth.

These are the mere basics of navigating Procreate, but there’s so much more to learn in this app. You just have to play around with it and spend some time learning the gist of it. Once you do you’ll be creating masterpieces in no time!
I hope this helps you decide to move forward with Procreate because it has made digital art so much easier and less daunting for me. If you have any questions let me know in the comments; otherwise, go and draw some sunflowers for me!


Comments